Table of Contents
ToggleSMT Meaning and How to Remove Solder
Are you wondering how to remove solder without damaging your precious SMT components? If so, you’re not alone. Many manufacturers face problems removing solder cleanly from their PCBs. Solder removal becomes critical when reworking boards or correcting mistakes.
SMT Meaning in Electronics
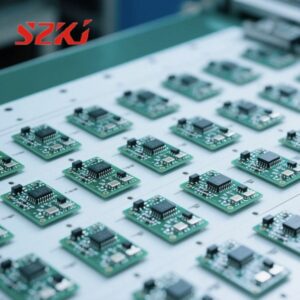
SMT stands for Surface-Mount Technology. It is the method where electronic components are mounted directly onto the surface of printed circuit boards (PCBs). Unlike older through-hole methods, SMT uses tiny components. This saves board space, cuts costs, and boosts manufacturing speed. Understanding the SMT meaning tells us why soldering techniques must be precise and reliable.
Why Removing Solder Correctly Matters in SMT?
SMT meaning Surface-Mount Technology, precision matters a lot. Incorrectly removing solder can ruin expensive components or the whole PCB. Damaged boards lead to higher production costs and delays. Knowing how to remove solder properly ensures higher quality, reduces waste, and maintains production schedules.
Risks of Incorrect Solder Removal:
- Component damage
- PCB surface damage
- Electrical malfunctions
How to Remove Solder Safely?
Removing solder properly can feel tricky. But you can achieve professional results by following these clear and understandable SMT meaning, simple steps.
Step 1: Gather Essential Tools
Before starting, you need to have your tools ready, like the desoldering pump, solder wick, soldering iron, flux, and tweezers.
Step 2: Heat Your Soldering Iron
Adjust your soldering iron or hot air rework station to the recommended temperature (around 350°C or 660°F). Precise heat prevents damage to the PCB or components.
Step 3: Apply Flux
Apply a small amount of quality flux to the solder joint. Flux helps solder melt faster and cleaner, ensuring smoother removal.
Step 4: Melt the Solder Joint
Gently touch the solder joint with your heated soldering iron. Keep the heat steady until the solder melts completely.
Step 5: Use a Desoldering Pump or Wick
Quickly use your desoldering pump to suck up melted solder. For smaller joints, press a solder wick against the solder to absorb it. Remove the wick carefully after solder absorption.
Step 6: Inspect and Clean the Area
After removing the solder, inspect the area closely. Use isopropyl alcohol to clean any leftover flux or solder residue, keeping your board spotless.
Step 7: Final Check and Component Removal
Finally, gently lift off any SMT components with tweezers. Ensure no solder bridges remain. Check carefully under magnification to confirm all solder removal is complete.
Common Mistakes to Avoid When Removing Solder
Knowing common mistakes saves time and resources:
- Excessive Heat: Applying too much heat damages components and PCBs. Use just enough heat to melt solder.
- Rushing the Process: Patience is crucial. Rushing leads to errors and possible damage.
- Poor Tool Maintenance: Regularly clean and maintain tools to ensure effectiveness.
Avoiding these pitfalls helps you maintain high-quality standards consistently.
Additional Tips for Optimal Solder Removal in SMT Applications
Here are some expert tips based on our extensive industry experience:
- Preheat PCBs: Gentle preheating makes solder easier to remove.
- Use Quality Flux: Good quality flux eases solder melting and removal.
- Practice Makes Perfect: Regular practice with different tools boosts proficiency.
Applying these pro tips gives your business a clear competitive edge in SMT manufacturing and also projects a better understanding of SMT’s meaning.

